IBMQ Setup
To use or emulate the IBM quantum computing devices the user will need to provide pytket.extensions.qiskit with an API token from IBM Quantum.
Anyone can make and use IBM resources, but free users will only have access to a few small devices.
To begin, make sure you have both InQuanto and pytket.extensions.qiskit in your Python environment (Use pip install pytket-qiskit if needed).
Create an IBMQ account
Go to: https://quantum-computing.ibm.com/
Either use an auxiliary login (e.g. Google) or follow instructions for IBMid creation
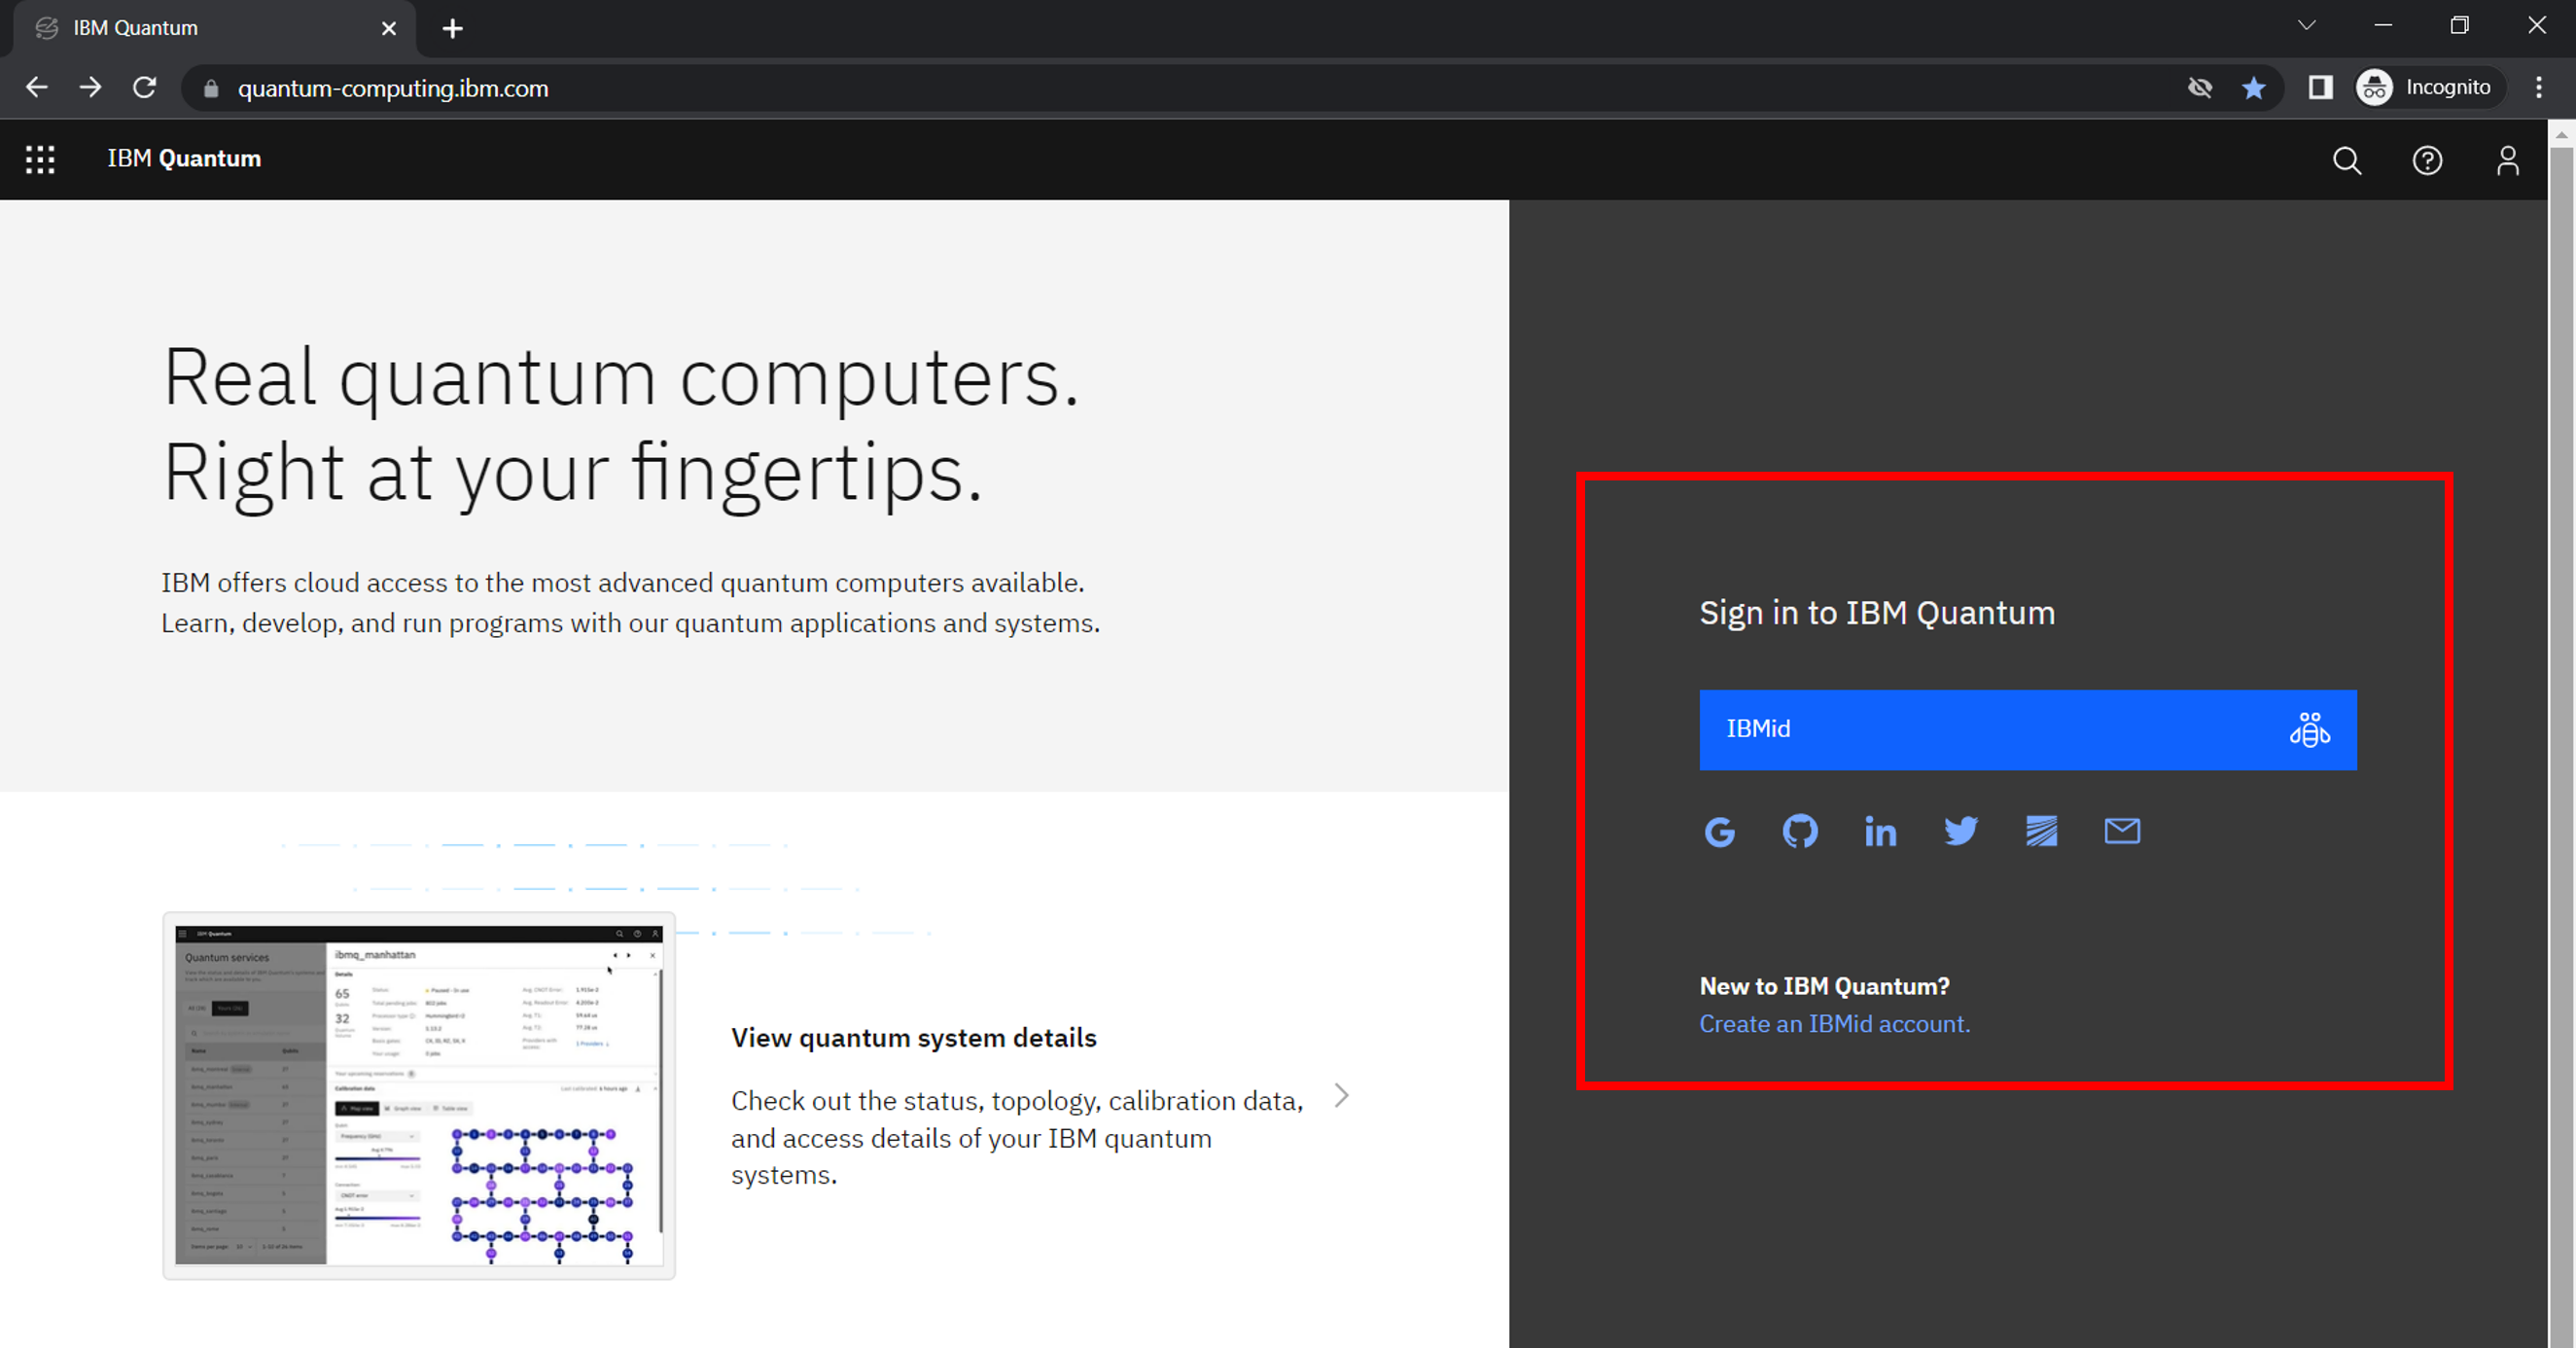
If using IBMid, fill out the user input details, complete the 2-factor authentication, log-in, and agree to their EULA.
On logging in to https://quantum-computing.ibm.com/ the user should be presented with the following home-screen:
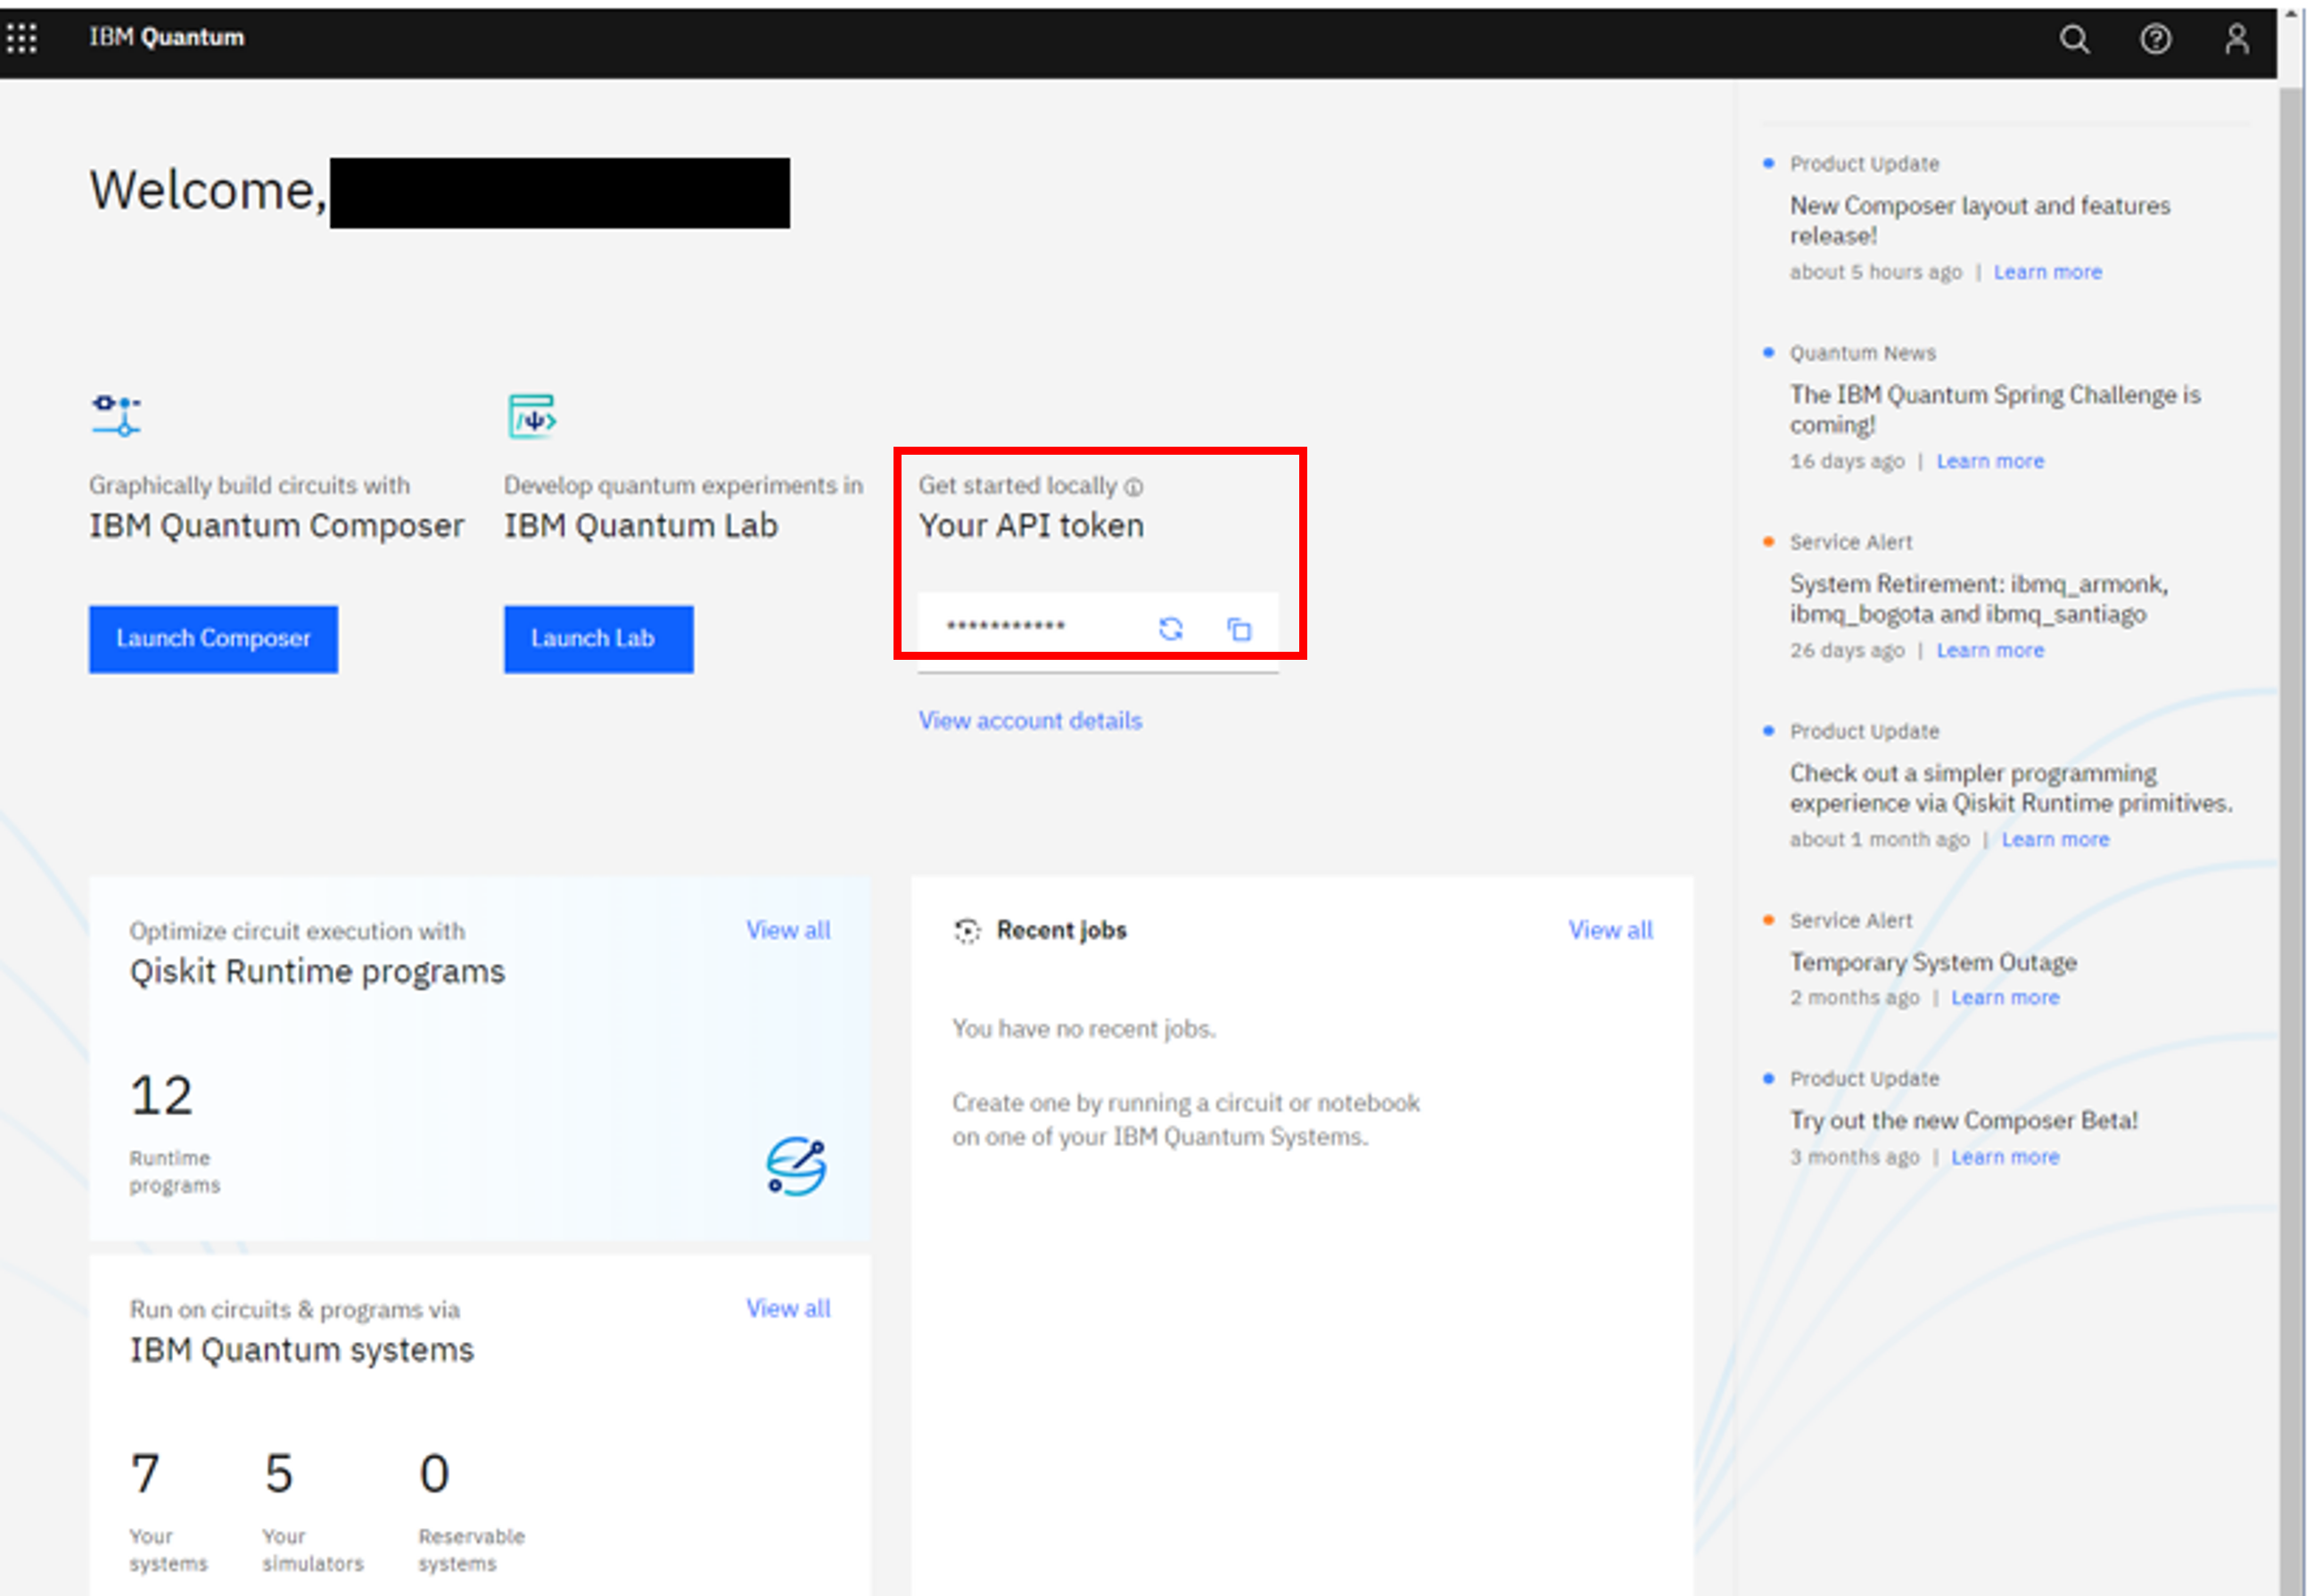
Get IBMQ API token
The API token can be easily copied from the IBMQ home-screen (highlighted in red above).
To store the IBMQ API token for use with InQuanto, open a python shell or notebook and use:
from pytket.extensions.qiskit import set_ibmq_config
set_ibmq_config(ibmq_api_token='XXXX')
where ‘XXXX’ is the API Token copied. Note that generating a new API token (♲) will invalidate the old token.
As well as the API token, the user will need to specify a machine to emulate. This is detailed below.
Choosing a quantum device
With the API token set, we can choose a machine to run on/simulate.
The list of available machines can be found by clicking ‘View all’ on the IBM Quantum systems section of the IBMQ home page.
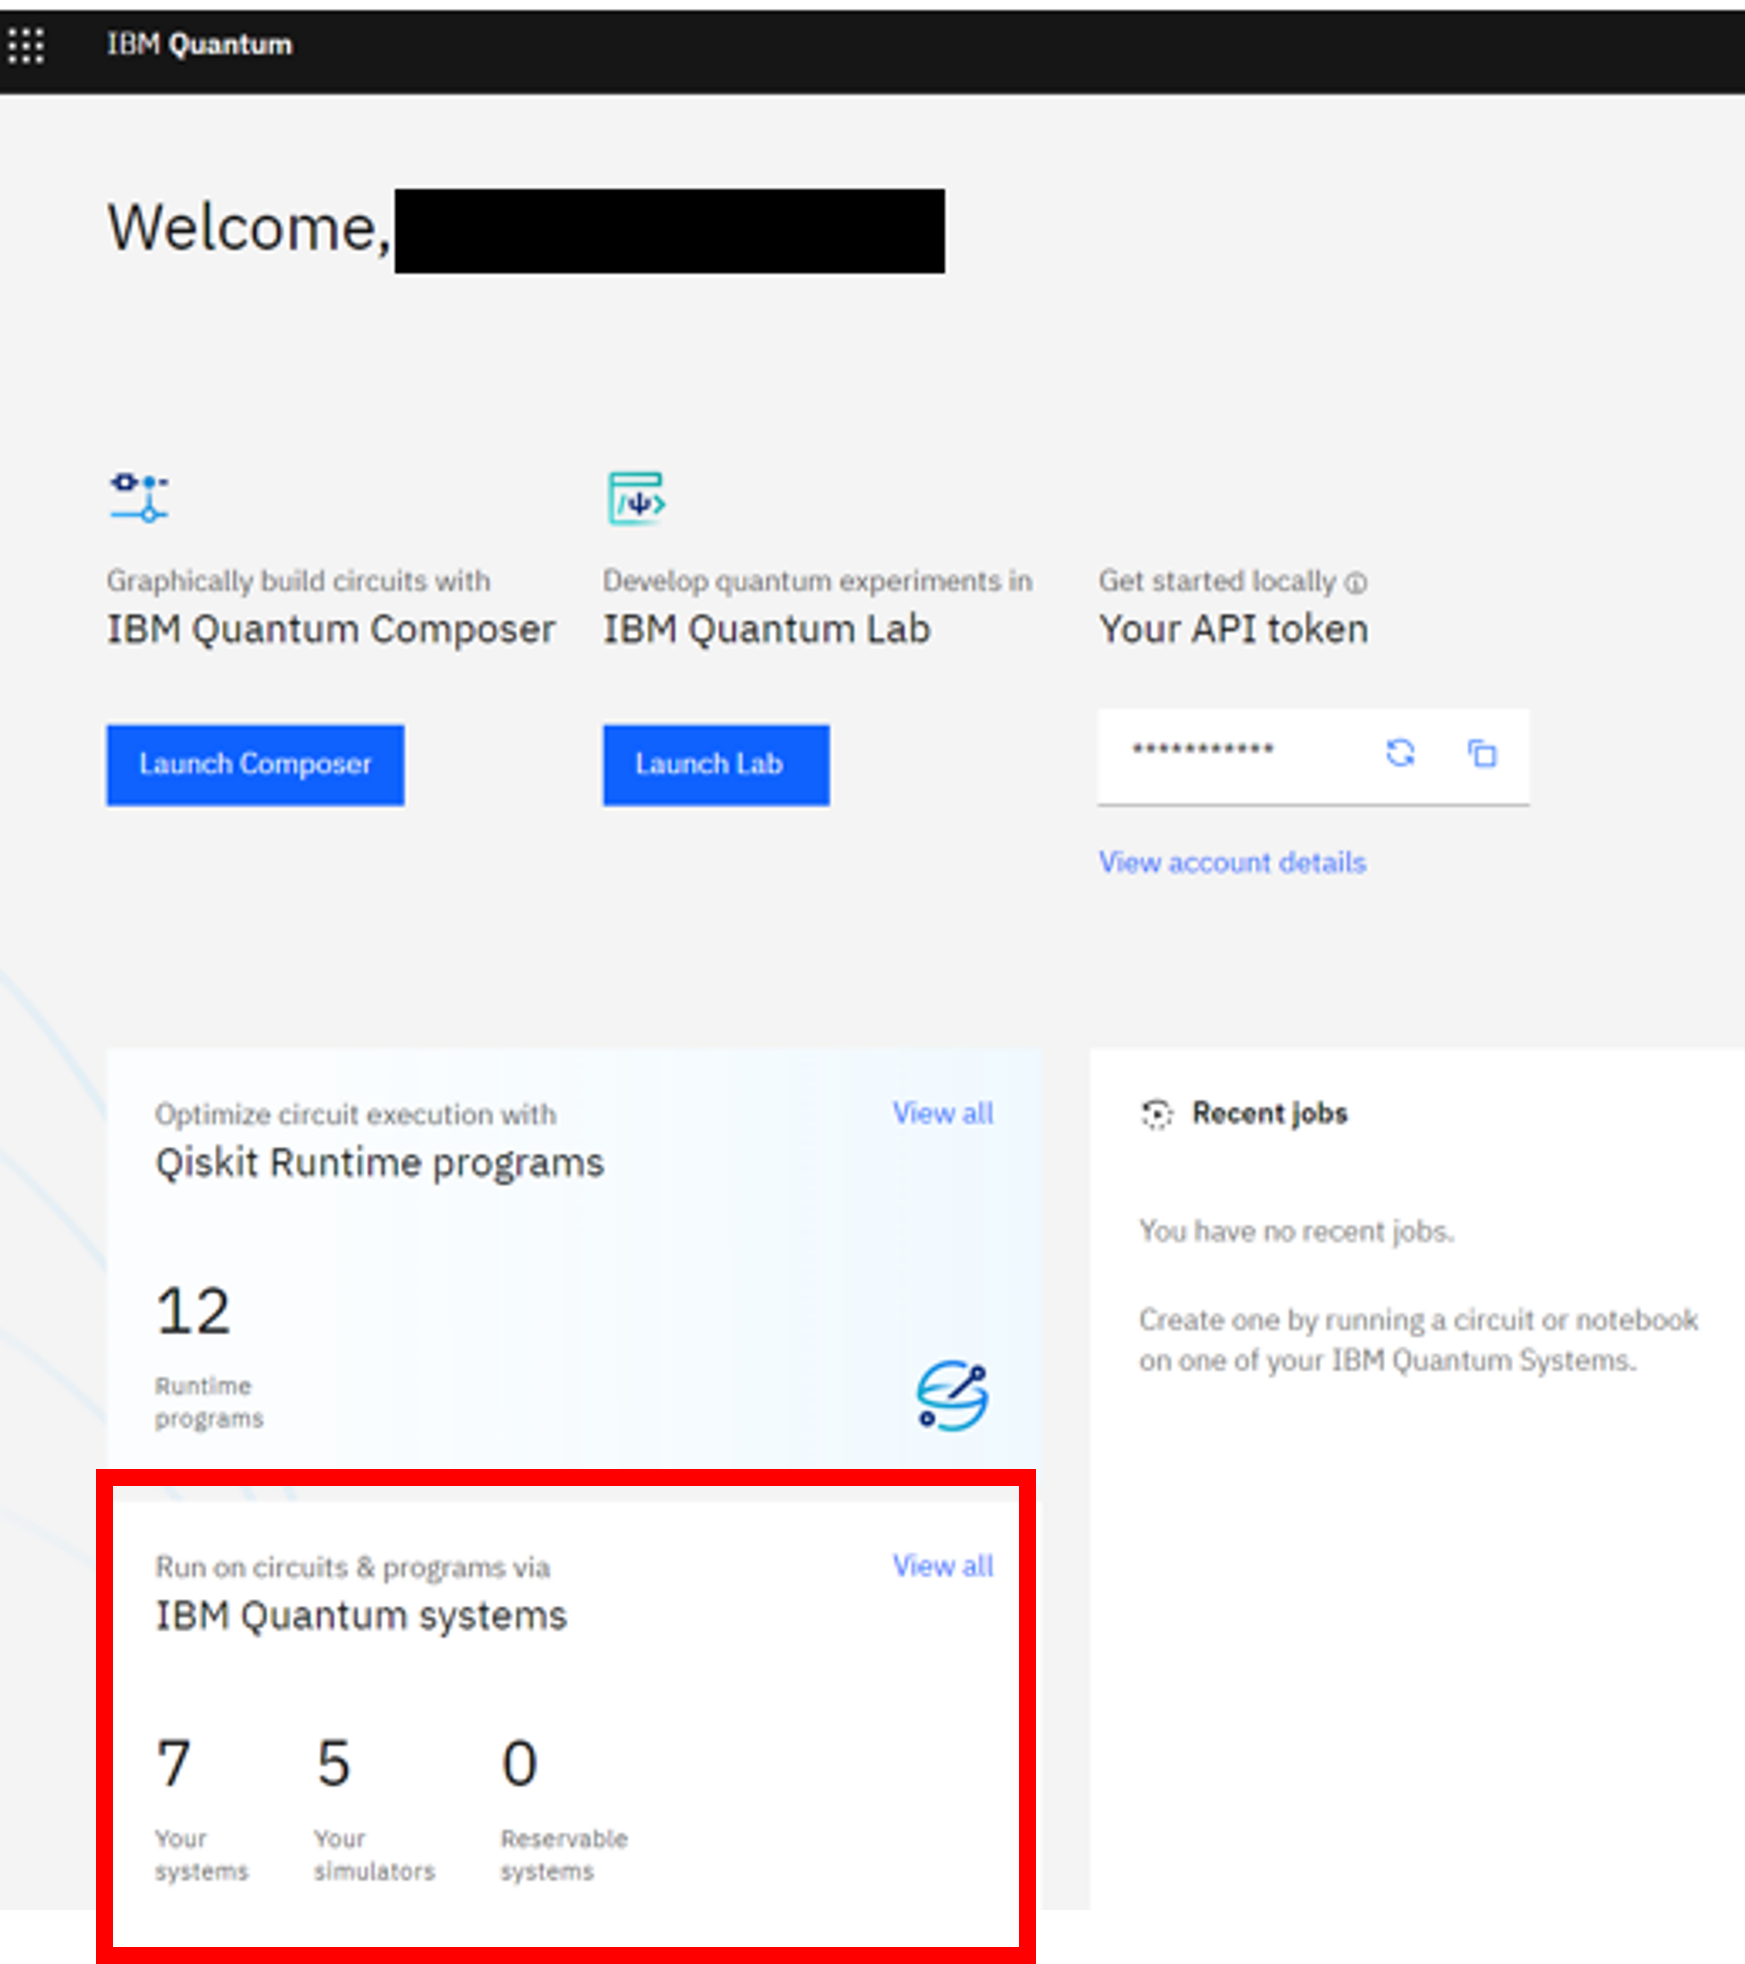
When on the device page, the list can be filtered to show only devices available to the user.

Clicking on a listed machine will show the user many details about that machine. For example, the gate error or the number of jobs queueing to run on it.
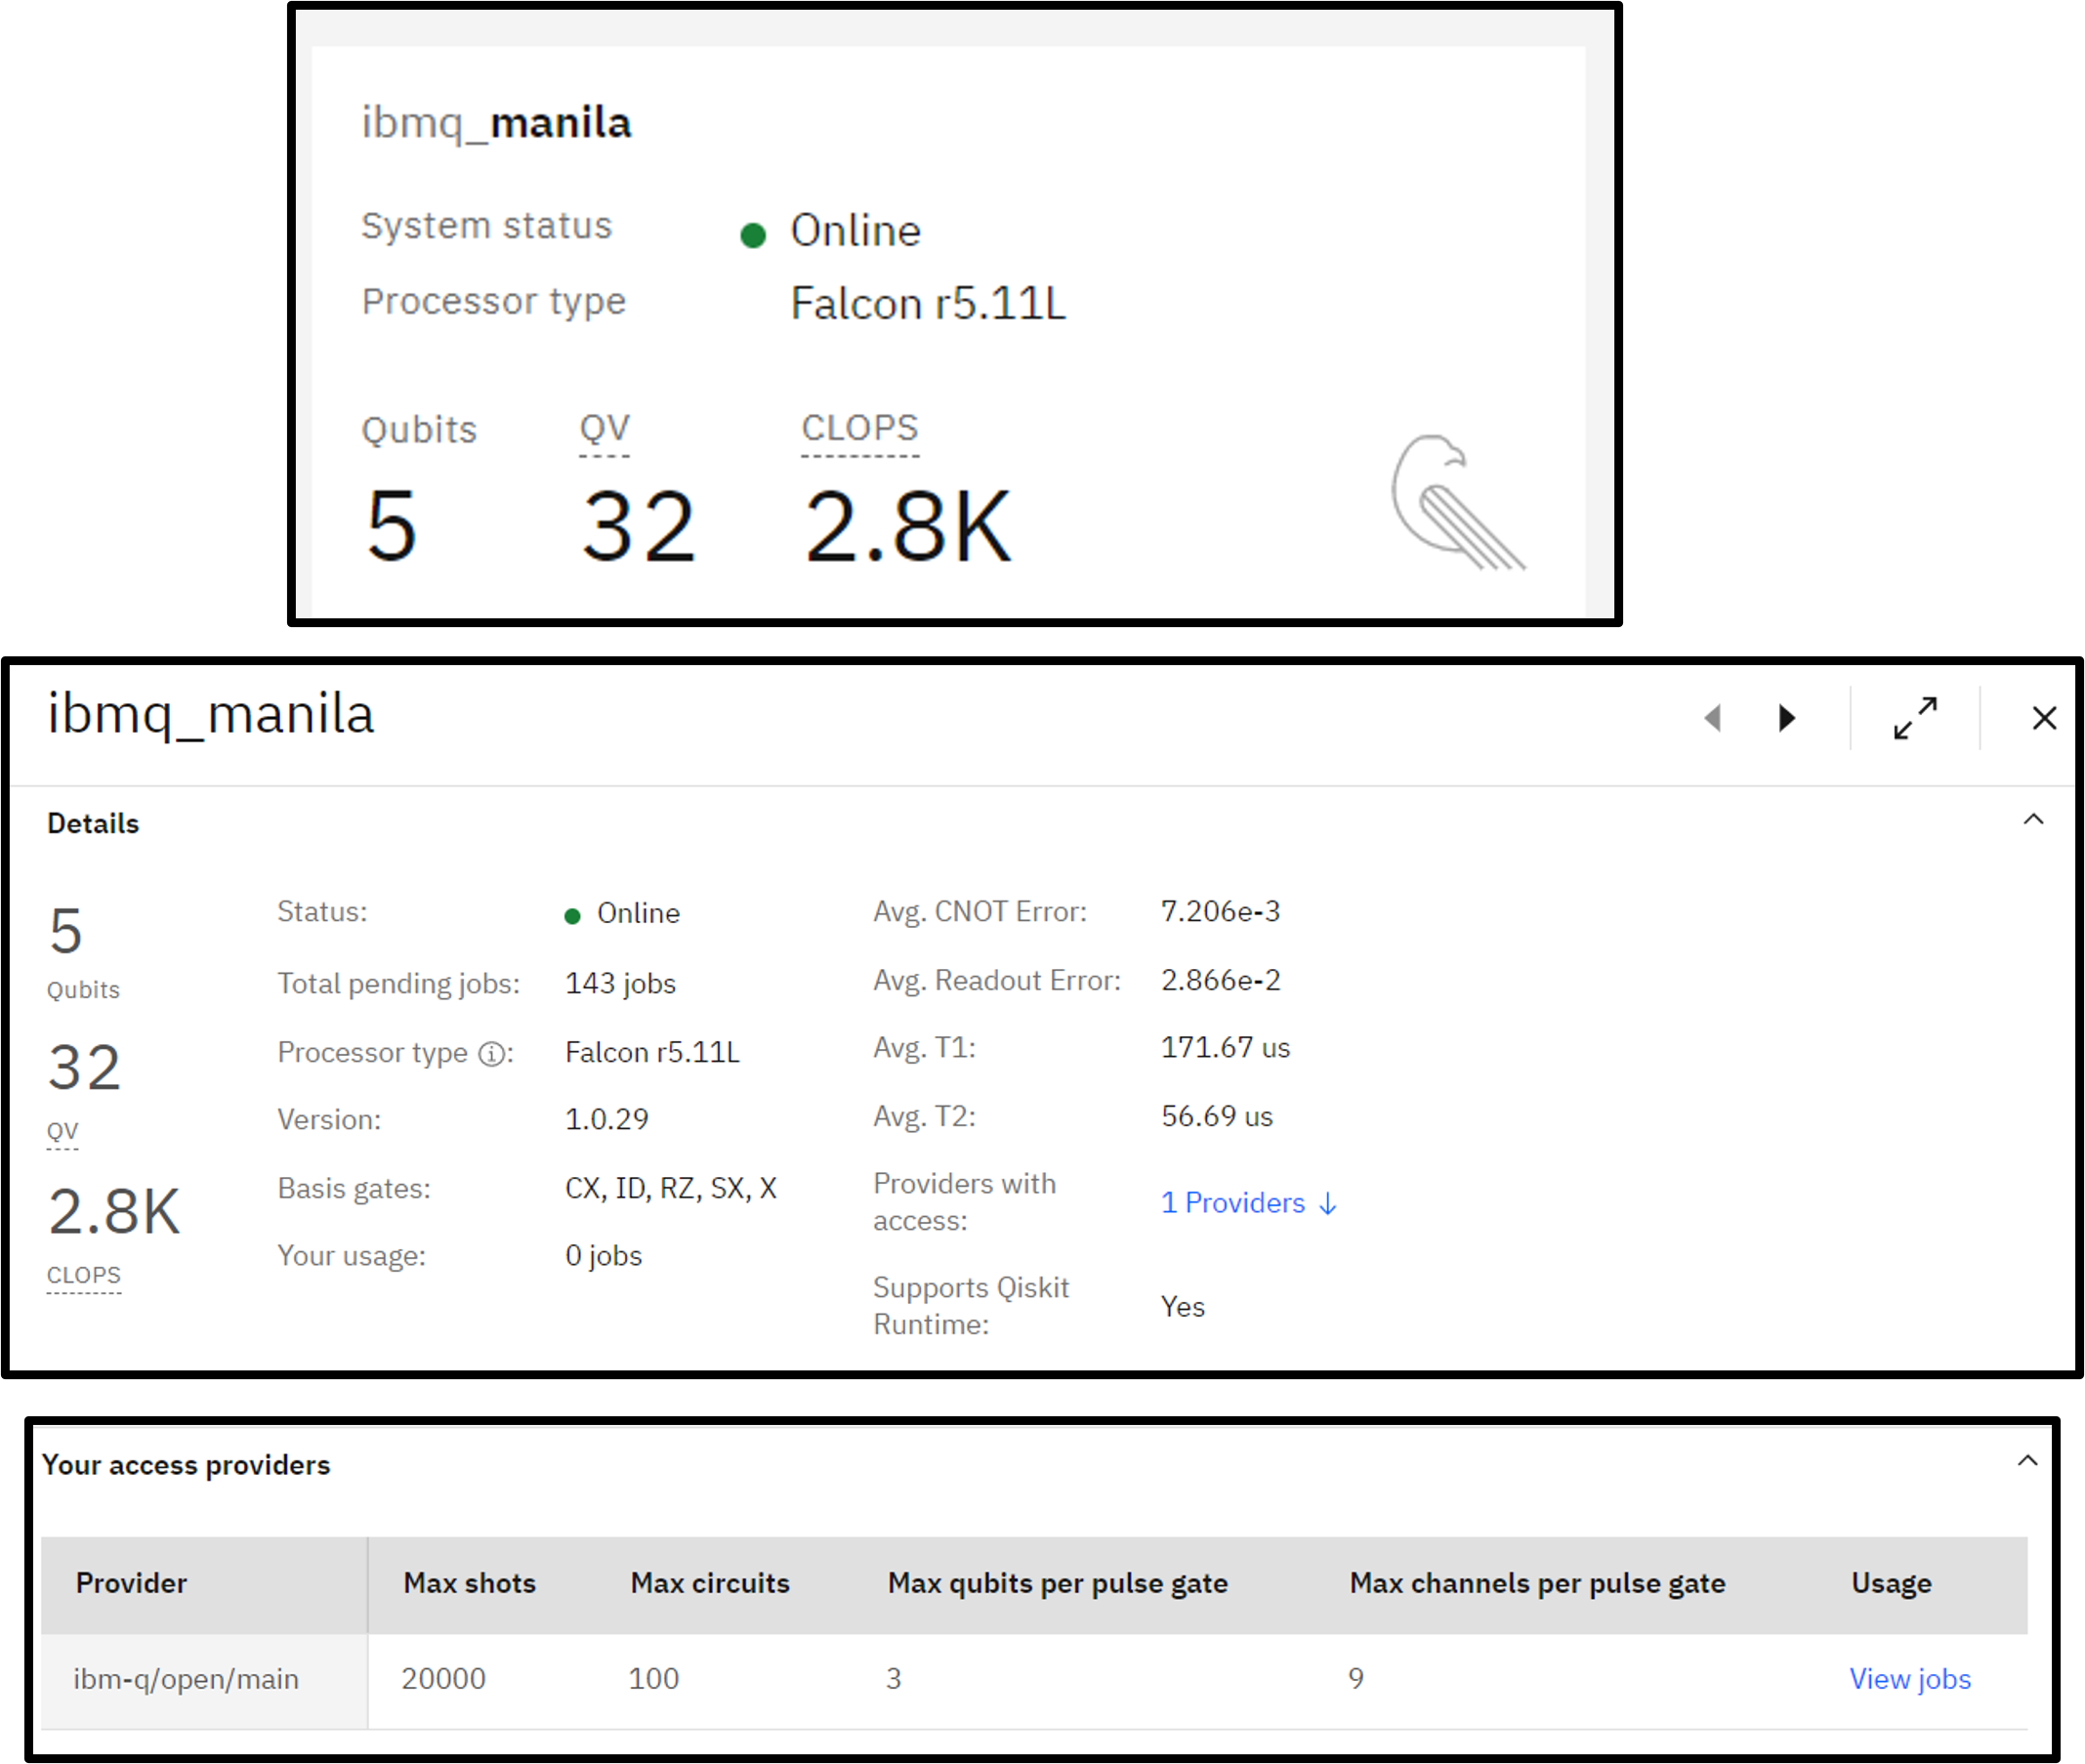
To get the machine details needed for computing, scroll down or click the ‘Providers with access’ link.
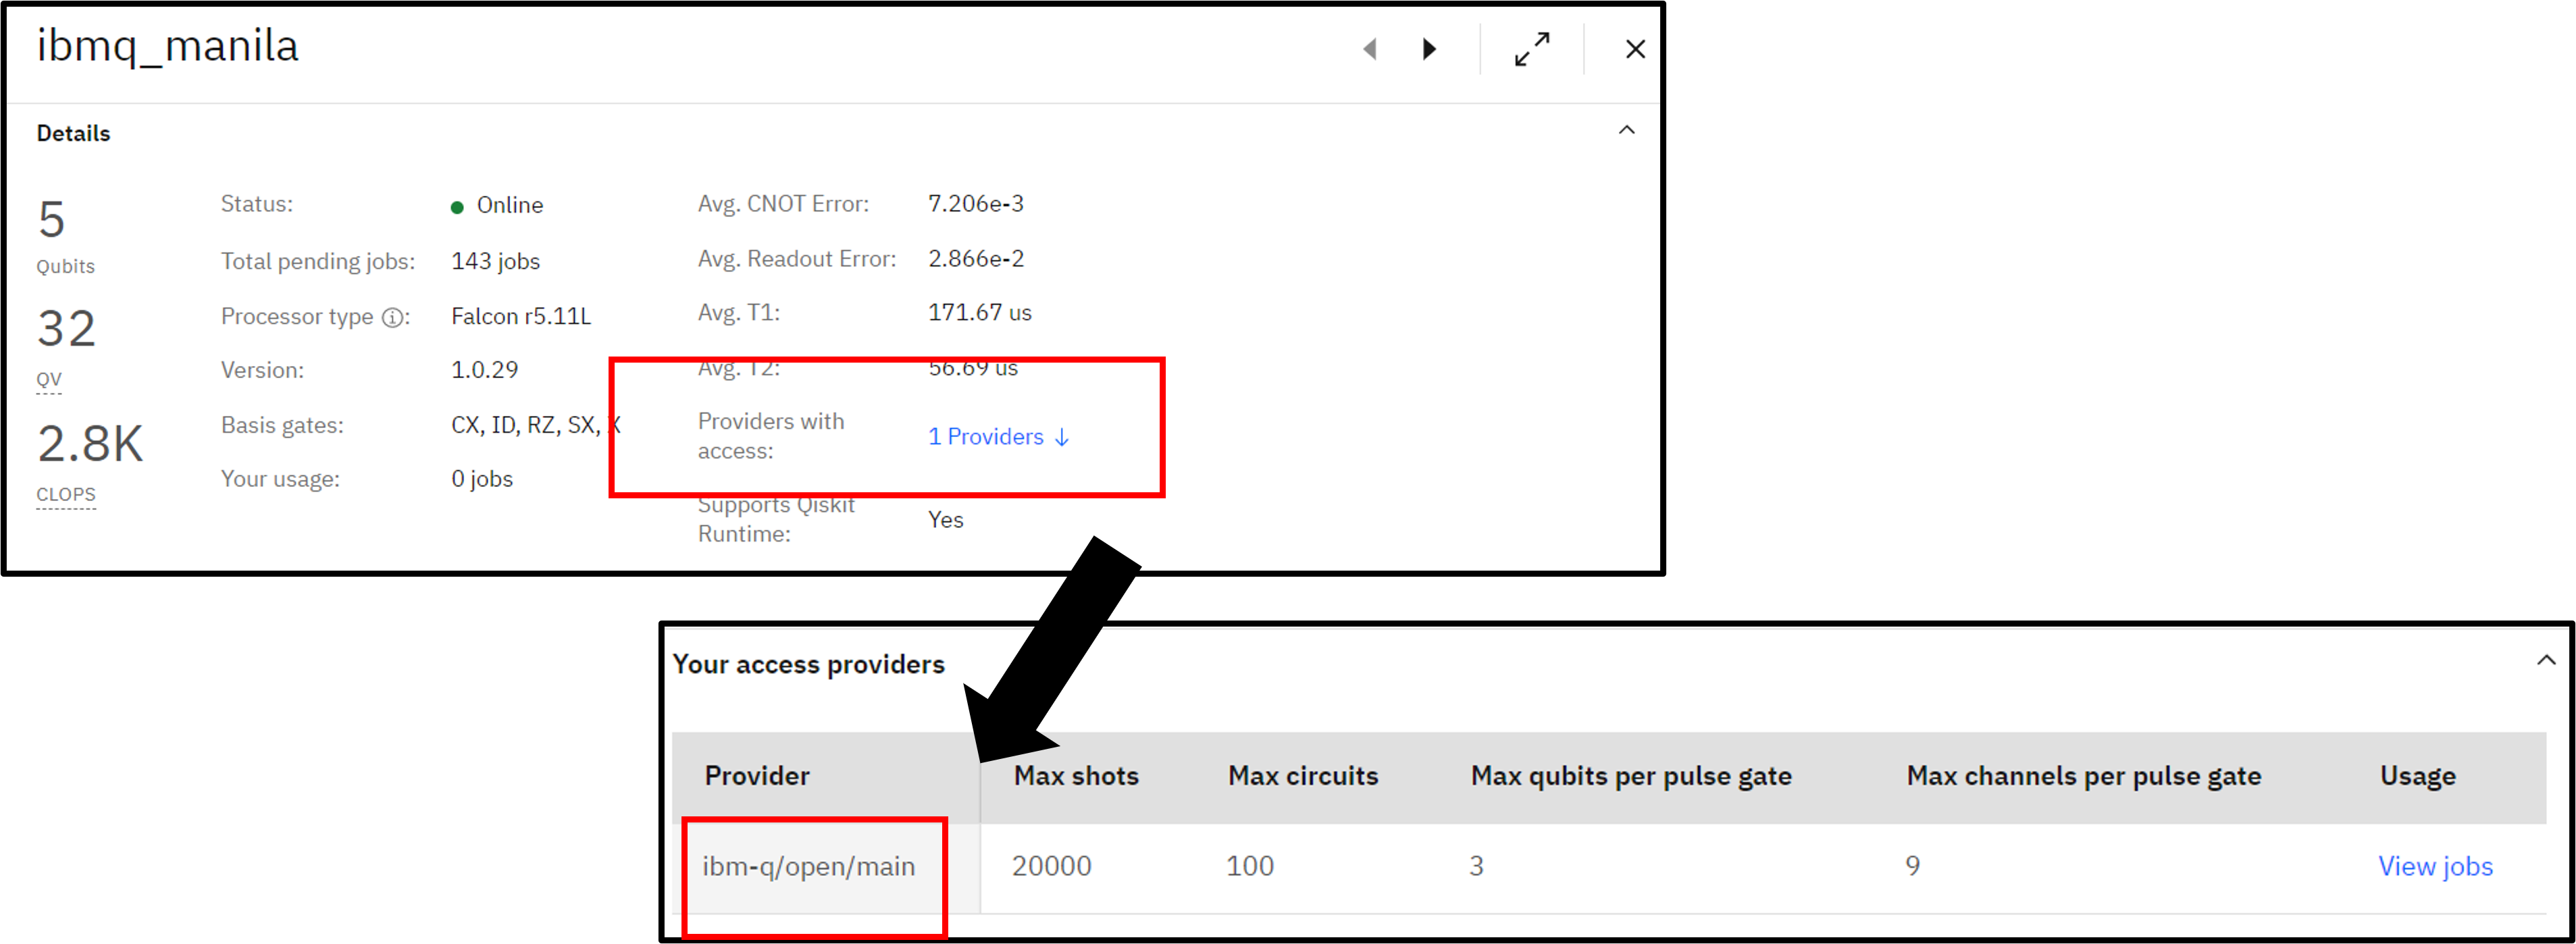
In your python shell or notebook, the machine details can be set, for example using:
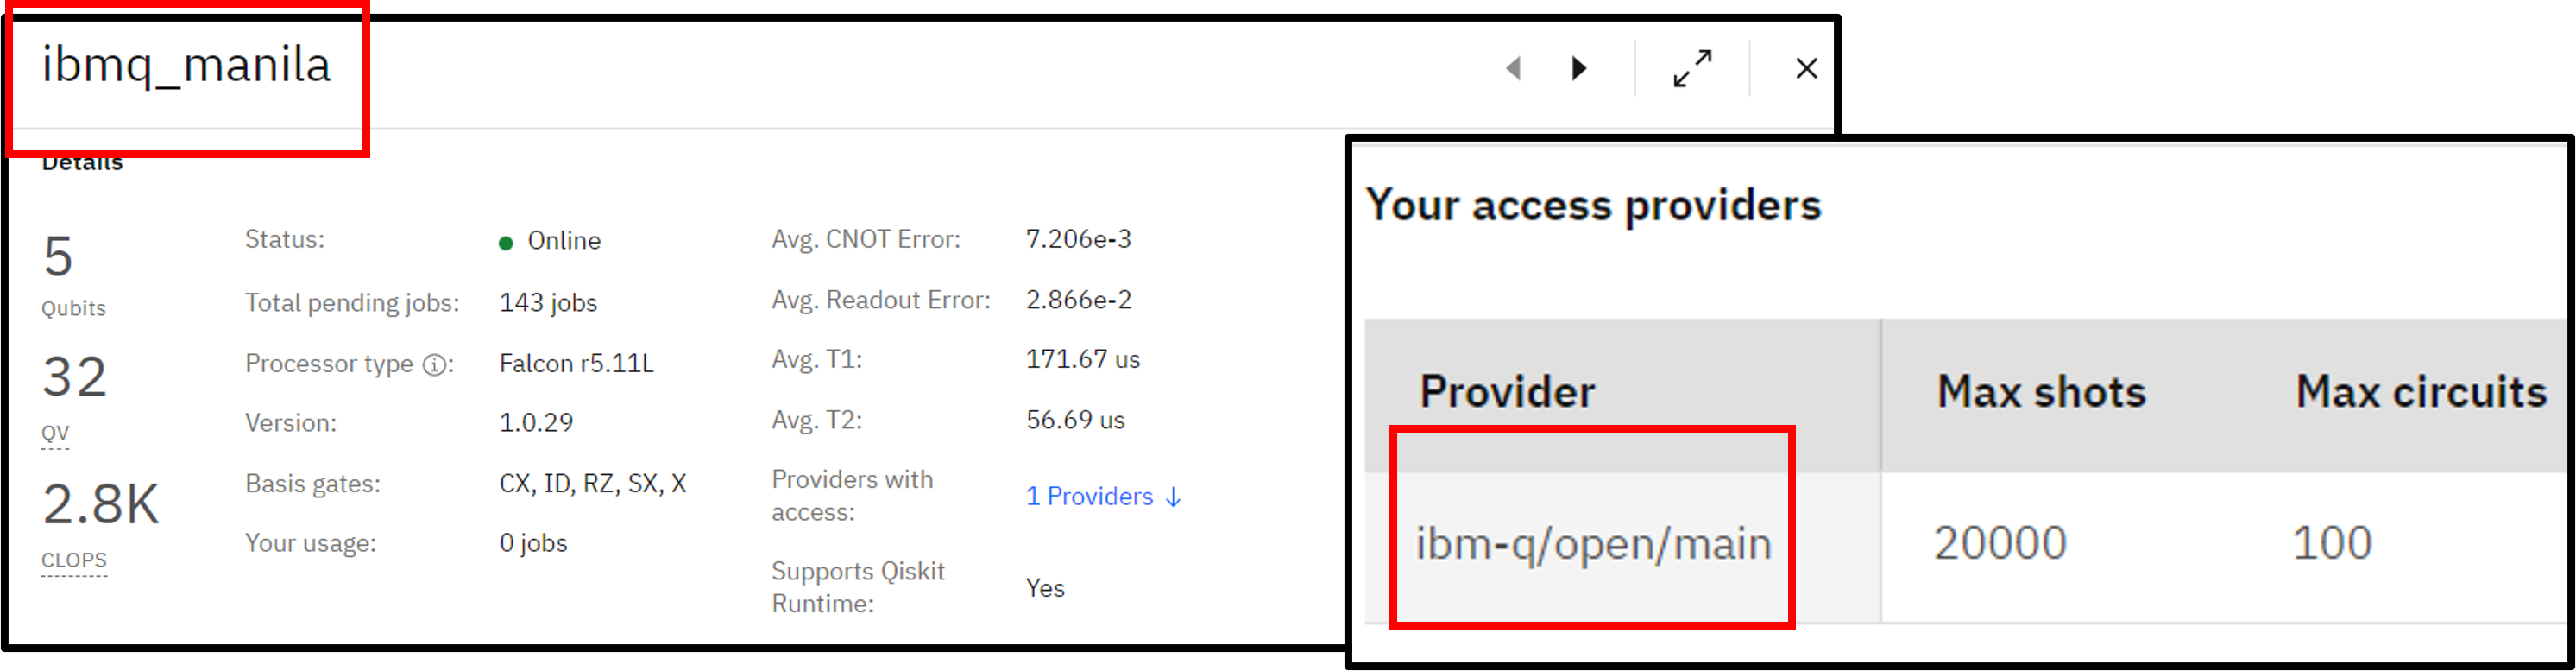
from pytket.extensions.qiskit import IBMQEmulatorBackend
backend = IBMQEmulatorBackend(backend_name="ibmq_manila", instance="ibm-q/open/main")
In the example above we have set up an emulation of shots on the 5-qubit IBMQ Manila machine using the ‘free’ queue.
To run a calculation on the physical quantum device, simply change IBMQEmulatorBackend to IBMQBackend. However, when running hardware experiments on a free queue, please be considerate of your usage and other users. Another key point is that when submitting hardware experiments, the user will need to keep the python kernel running until results have been returned and processed.